NEW! There’s a Tagalog version of this tutorial, just go to this link – (WordPress tutorial – Tagalog Version)
Alright, by being with my blog for some time now, you should be able to make basic web pages following the tutorials I’ve created over the past month. Now we’re going to tackle the very first WordPress tutorial that I’m planning to have a series about. This will be an absolute beginner’s tutorial so if you are looking for advanced stuff please stay tuned for future posts.
What makes this WordPress tutorial different from others?
There’s a very good chance that you have been into multiple WordPress tutorials by now. If you google WordPress tutorial, there are hundreds of thousands or maybe millions of blog posts about this already. All are probably in the same right direction, but for things to be easy to understand I’ll try to make this tutorial simple.
WordPress is still a very popular cms platform this year of 2018 because it’s easy to use and really fun to learn. The level of customization you can do with it is surreal, you can install plugins that suit your needs, install themes that fit your style and can even create your very own theme!
If you want to start a blog I highly recommend using this wonderful platform so you could just mainly focus on writing articles because there are tons of plugins that can take care of other important things for you like checking out the SEO stuff, making it sure that you’re doing fine. A grammar checker plugin or almost everything that you could think of that could help you in your journey.
What will be the main pointers of this WordPress tutorial?
- WordPress Installation
- Blog Post Creation
As I said, my aim for this tutorial is to be simple so, for now, let’s just tackle two topics. You will learn how to install WordPress using your hosting’s cPanel and create your very first blog post. It’s important at this point that you have your own hosting, or else you won’t be able to follow the proceeding instructions. If you don’t have hosting plan yet and just want to have a clue on WordPress stuff then be my guest. Or, if you really want to learn how to install WordPress but don’t have the ability to purchase a hosting plan then try installing Appserv. I’ll be doing a tutorial on how to install WordPress locally soon though but feel free to research on how to use that.
Okay’ let’s proceed.
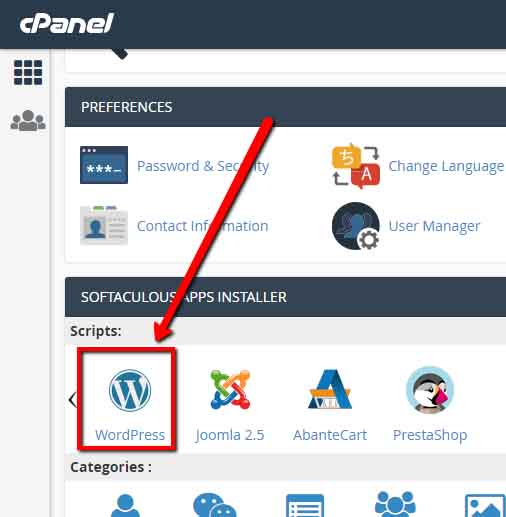
Login to your Host’s cPanel section
And from there, look for the software installation that comes with your package. Mine is called “Softaculous”, and my cPanel is generous enough to show me the WordPress icon from the home page. So if you see yours, click it and then you will be taken to the next phase.
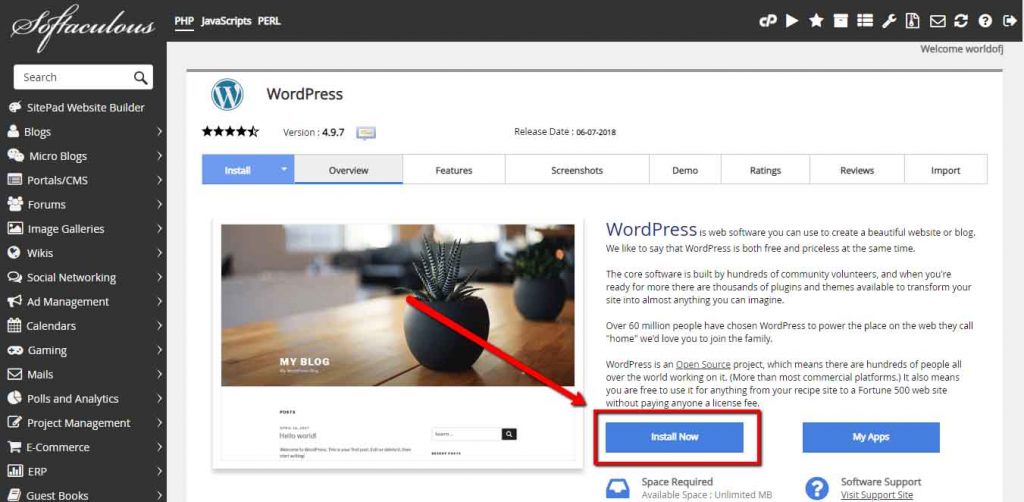
You should see the WordPress installation overview now. You can view its features, see screenshots, see the demo, see reviews, but for now let’s just go ahead and click Install Now button.
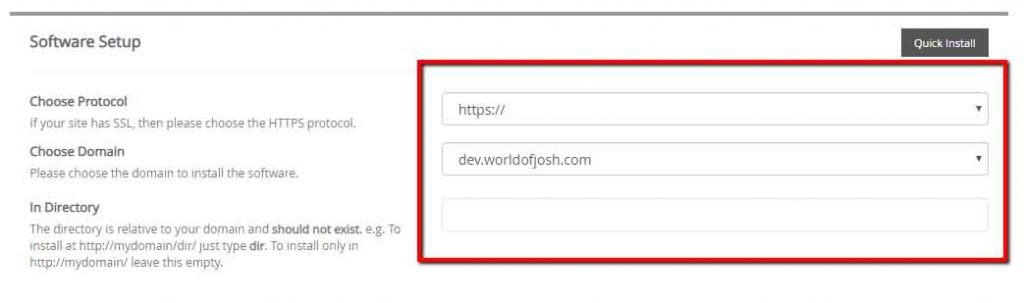
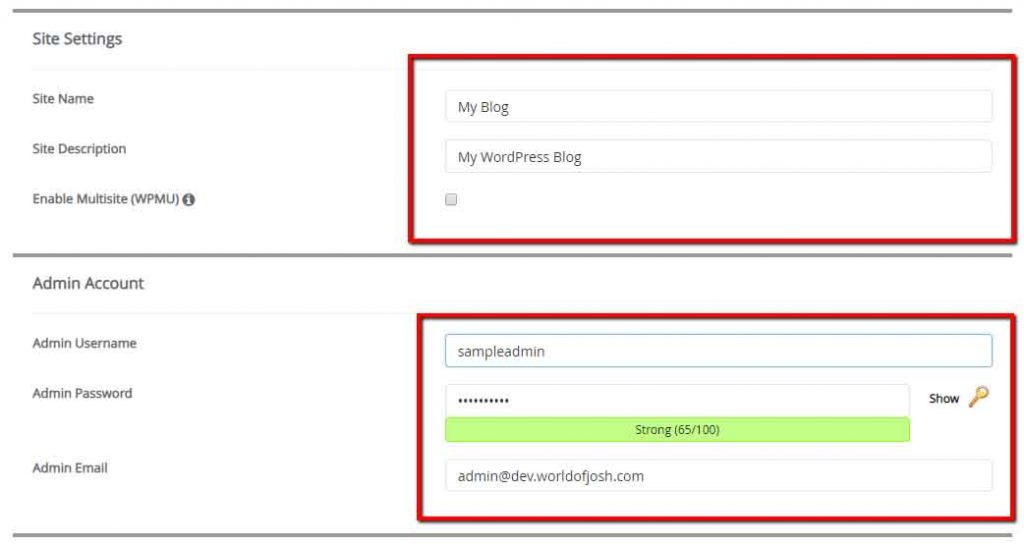
Under Software Setup select the domain that you want to install the WordPress into. Leave the In Directory option blank if you are not installing inside a directory. Then after that, scroll down further until you see Site Settings and Admin Account options. Go ahead and fill these in, make sure that every information you use is appropriate for your blog.
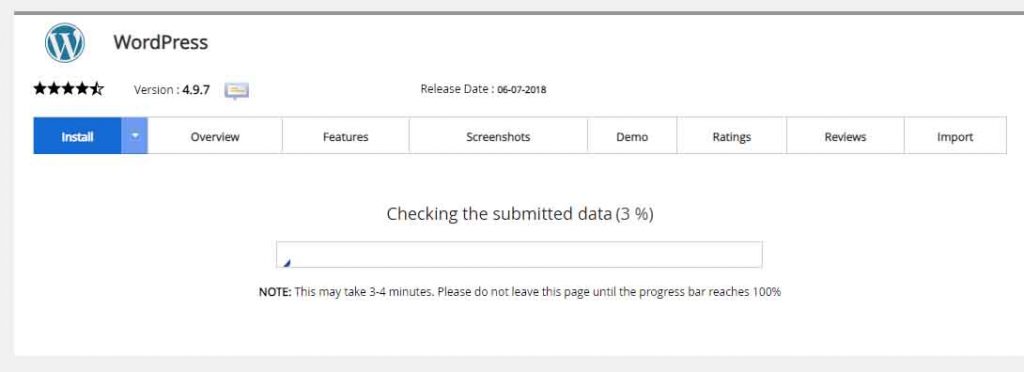
Scroll down to the bottom of the page and click the install button and wait for it to finish its work.
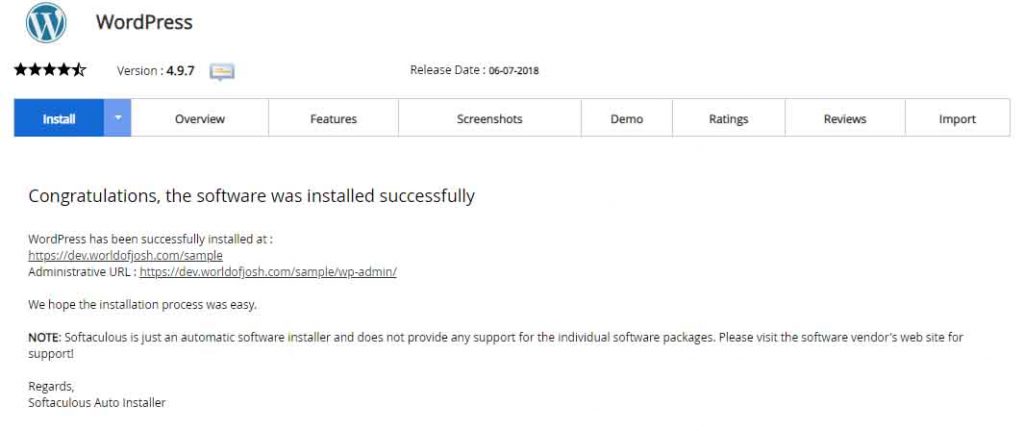
Beautifully done. Now you learned how to install a WordPress on a live hosting site. The next thing we are going to do for this WordPress tutorial is to create our very first blog post. Because what’s the point of having a fully working blog without post right? so without further ado, here’s the second part of this tutorial.
Creating your very first blog post
On the final phase of installation of the WordPress software, you should be presented the login information you need in order to access your freshly installed website. So in case you haven’t noticed yet, it’s up there with the “/wp-admin” at its end. So go ahead and proceed to that link and log in using the information you have created earlier.
Once logged in, you will be taken to the simple backend of the famous WordPress cms platform. Take time to familiarize your self with the pane on the left-hand side, it would be handy if you get to know it really well so in future you will not run into trouble remembering where are things supposed to be.
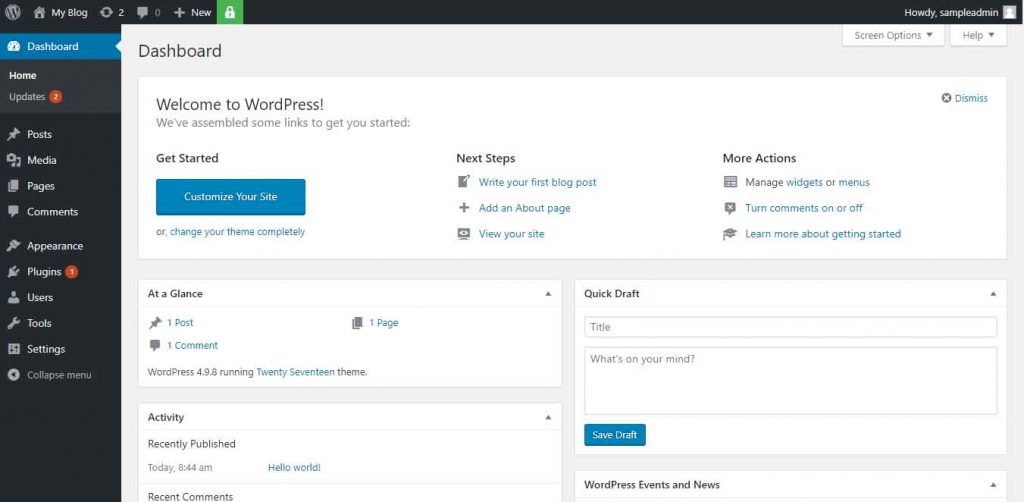
So from there, go ahead and click Add New under Posts option within the pane on the left.
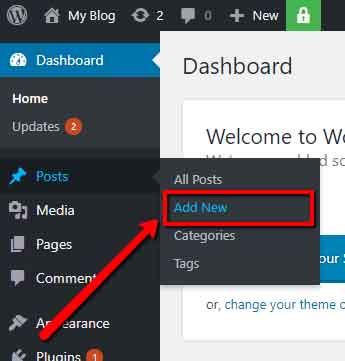
Put your title at the very top field and write the content below it within the visual editor section. Select which category will it go (in my case it’s named Blog but by default, it’s named as Uncategorized, you can easily change it by going to Categories under the Posts options).
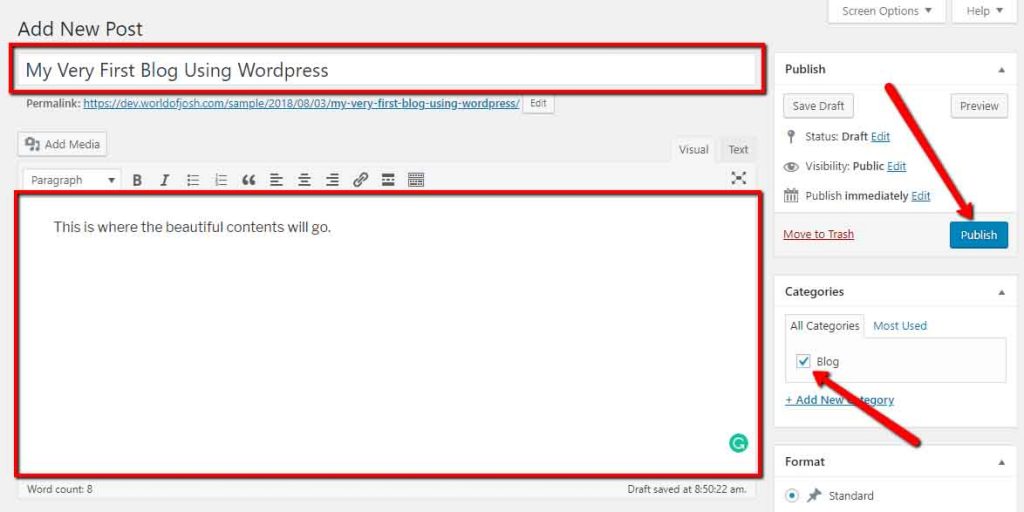
When you are contented or just wanted to see the fruit of your labor, go ahead and hit Publish button and click on View Post to see your very first blog post!
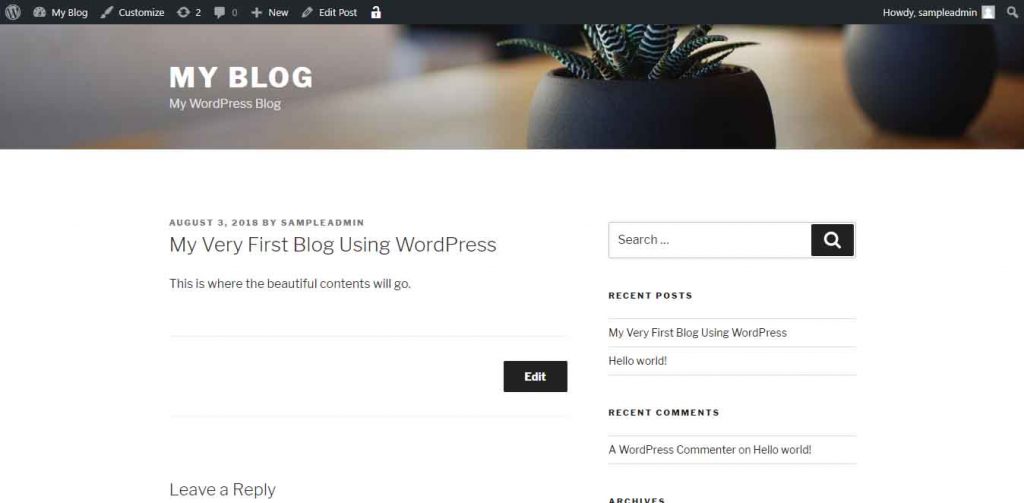
There you have it! your very first blog post. That wasn’t hard at all, was it? Learning unfamiliar things is not impossible as long as you are determined to take all courses of action to achieve it. I will try hard to stay in a very simplistic way of teaching as I don’t want my readers to be scared of touching things that they don’t know nor understand yet.
Now, this is a very simple yet informative WordPress tutorial for beginners who wanted to learn how it works in a simplistic manner. For those who are looking for more challenges, stay tuned while I make more new posts regarding WordPress. I do hope that you were able to get some help by reading this post, if by any chance you didn’t understand some part of this, feel free to contact me anytime or leave a comment below. I’ll try my best to get back to you on your inquiries.
As always, thanks for reading!
Facebook Comments